

Do you know that how good you are at Contra 4 and how often you clear a mission or die at the first boss highly depends on how well you understand the controls and the rhythm of the game? So today I will give you a complete walkthrough that will improve your gameplay a lot. So let’s get started.
Contra 4 on Java mobile is one of those rare ports that actually respects the original.
It’s not some watered-down version with auto-aim and infinite lives. It’s the real deal, one hit, you’re dead. Three lives, game over. Continue if you dare. I spent weeks dying at the Waterfall stage before I figured out the patterns, and once I did, the satisfaction of clearing Mission 5 was unmatched. This guide is everything I wish I knew on day one.
Quick Game Info Table
| Attribute | Details |
|---|---|
| Game Title | Contra 4 (Java ME Version) |
| Genre | Run-and-Gun / Side-Scrolling Shooter |
| Platform | Java-enabled mobile phones (J2ME) |
| Controls | Numeric keypad (*, #, 0-9) |
| Developer | Konami (original), ported for mobile |
| Game Modes | Story Mode, Arcade Mode, Challenge Mode |
| Player Count | Single-player (some versions support 2P via Bluetooth) |
| Approx. Size | ~300KB – 1MB |
History & Background: Why Contra 4 Java Still Matters
Contra started in 1987 as an arcade cabinet that ate quarters and broke friendships. By the mid-2000s, mobile phones were becoming powerful enough to run serious games, and Konami saw an opportunity. The Nintendo DS got Contra 4 in 2007 — a full-blown revival with dual-screen action and grappling hooks. The Java mobile port came shortly after, stripping away the DS-specific features but keeping the soul intact.
What makes the Java version special? It proved that you don’t need a $300 handheld to experience hardcore action. A $50 Nokia with a numeric keypad could deliver the same adrenaline rush. Today, with emulators and retro phone collectors, this version has a dedicated following. It’s lightweight, offline, and brutally honest about your skill level.
The mobile port differs from the DS original in key ways: no grappling hook mechanic, simplified boss patterns, and smaller sprites to fit mobile screens. But the core — the one-hit deaths, the weapon cycling, the relentless enemy waves — that’s all here.
Key Features Breakdown
Weapon System: The game uses a cycling power-up system. You shoot red falcon items to release weapons, then catch them as they cycle through R (Rapid), M (Machine Gun), S (Spread), L (Laser), F (Flame), and H (Homing). Each weapon fundamentally changes how you approach combat.
Level Design: Five distinct missions — Jungle, Waterfall, Snowfield, Energy Zone, and Alien Lair. Each introduces new environmental hazards that force you to adapt your movement and shooting patterns.
Boss Battles: Every mission ends with a pattern-based boss. They have visible weak points and predictable attack cycles. Memorization beats reflexes every time.
Power-Up Drops: The falcon cycling mechanic means you can choose your weapon, but you have to time your catch. Miss the Spread Gun, and you might be stuck with Flame Thrower in a boss fight. I’ve been there. It’s painful.
Lives & Continues: Three lives. No health bar. One bullet or one collision kills you. After three deaths, you can continue, but your score resets and some versions strip your weapon back to default.
Difficulty Levels: Easy gives you more continues and slower enemy bullets. Normal is the intended experience. Hard increases bullet speed, enemy count, and removes some power-up drops. I recommend starting on Normal — Easy teaches bad habits.
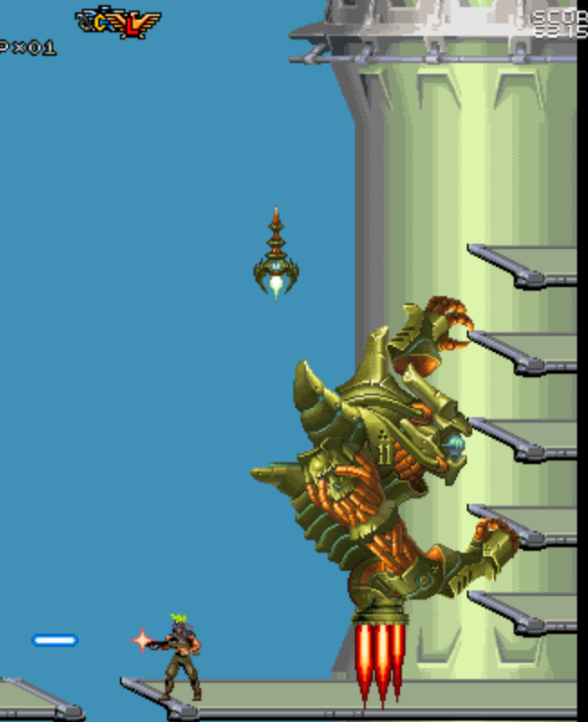
Game Screenshots
Complete Controls Guide (Numeric Keypad)
| Action | Button |
|---|---|
| Move Up | 2 |
| Move Left | 4 |
| Move Right | 6 |
| Move Down | 8 |
| Aim Up-Left | 1 |
| Aim Up-Right | 3 |
| Aim Down-Left | 7 |
| Aim Down-Right | 9 |
| Shoot | 5 |
| Jump | * or # (varies by version) |
| Switch Weapon | 0 |
| Pause | Left Soft Key |
| Select/OK | Left Soft Key |
| Back/Cancel | Right Soft Key |
Important note on Jump: Most versions use * for jump, but some older ports use #. If * doesn’t work at the title screen, try # immediately. I learned this the hard way when I thought my game was broken for ten minutes.
How to Play: Step-by-Step From Launch to Victory
Launching the Game & Navigating the Menu
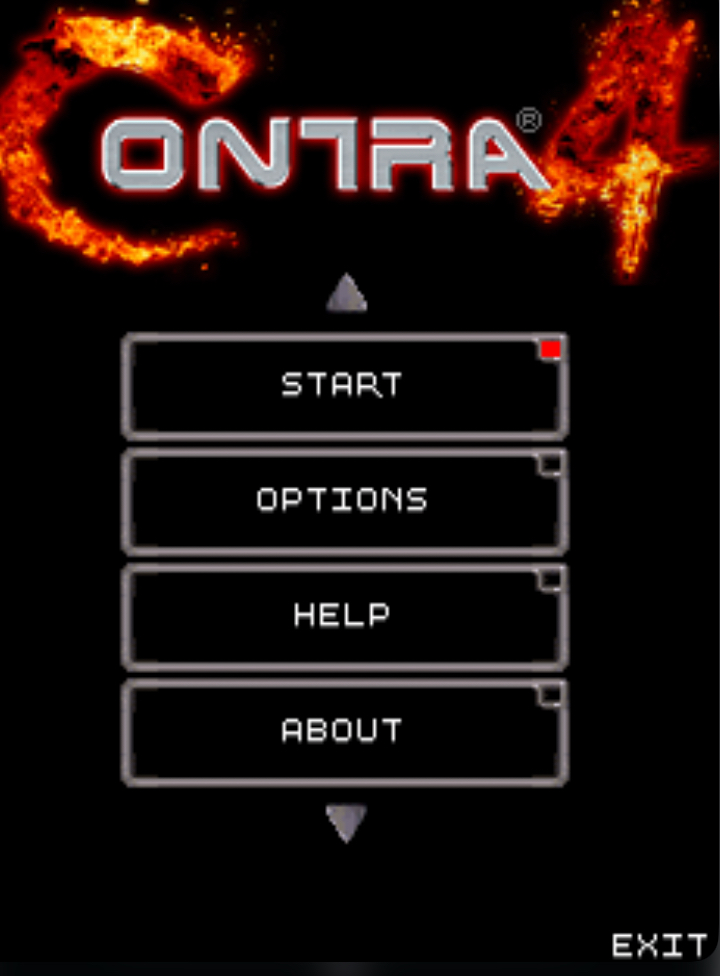
When you first start the game, you’ll see the Konami logo, then the title screen with “Contra 4” in that classic red font. Press Left Soft Key to skip the logos and get to the main menu.
You’ll see four options:
- New Game — starts fresh from Mission 1
- Continue — resumes from your last checkpoint if you have one
- Options — sound, vibration, difficulty
- High Scores — your best runs
What I do first: I go straight to Options. I turn vibration OFF — it drains battery and the buzzing distracts me during boss fights where I need to hear audio cues. I set difficulty to Normal. Then I go back and select New Game.
Character Selection
You get two choices: Bill (blonde hair, red bandana) and Lance (black hair, green bandana). Their stats are identical. The difference is purely cosmetic. I pick Bill because I’ve always played as Bill since the NES days. Pick whoever looks cooler to you — it won’t affect gameplay.
Mission 1: Jungle Infiltration — My First Steps
The mission starts. I’m at the left edge of the screen. The jungle background scrolls behind me. I immediately press and hold 6 to move right.
First enemy encounter: A soldier runs in from the right. I keep holding 6 and tap 5 rapidly to shoot. The default rifle fires straight ahead. Two hits and the soldier goes down. I don’t stop moving.
First power-up moment: About ten seconds in, a red falcon flies across the screen from right to left. I shoot it with 5. It drops to the ground and starts cycling: R → M → S → L → F → H → back to R.
I want Spread Gun. I position myself near the item and wait. When “S” appears, I walk into it. Now my shots fan out in five directions. This changes everything. With Spread, I can hit enemies above me while still shooting forward.
The bridge section: I approach a wooden bridge. Enemies drop from above. I press 2 + 5 to aim upward while still holding 6 to walk. The Spread Gun hits the falling enemies before they land.
My first death: I got greedy. I saw another power-up below the bridge and jumped down with *. There’s water down there. Instant death. Lesson learned: in Contra 4 Java, pits and water are always fatal. Stay on the path.
First mini-boss — The Tank: It rolls in from the right. Has a cannon that fires arcing shells. I keep my distance, using 4 and 6 to dodge left and right when I see the shell coming. I spam 5 with Spread Gun. The wide shot pattern hits the tank even when I’m not perfectly aligned. It explodes. Mission 1 complete.
Core Movement & Combat Mechanics
The Golden Rule: Never stand still. Contra 4 Java punishes stationary players harder than almost any game I’ve played. The enemies are designed to converge on your position.
How I move through every stage: I hold 6 constantly to move right. My right thumb taps 5 to shoot. My left thumb is ready on * to jump and 4 to dodge back if needed. This two-thumb system becomes natural after about thirty minutes.
Jump-shooting: Essential technique. I press * to jump, then immediately press 5 while in the air. This lets me hit enemies on platforms above while still advancing. I use this in almost every mission.
Crouching: Press 8 to duck. I use this when a low-flying bullet comes toward me. Ducking makes it pass over my head. But I don’t stay ducked — I tap 8 briefly, then stand and keep moving.
Aiming up: Press 2 while tapping 5 to shoot straight upward. I use this for ceiling turrets and enemies dropping from above. In the Waterfall stage, this is probably 40% of my shots.
Diagonal aiming: 3 + 5 shoots up-right. 1 + 5 shoots up-left. I use 3 constantly for enemies on elevated terrain while still moving forward. It’s the most efficient angle in the game.
Weapon Mastery: What I Use and When
| Weapon | How to Select | When I Use It |
|---|---|---|
| Spread Gun (S) | Press 0 until “S” shows | My default. Covers wide area. Best for crowds, tight spaces, and general use. |
| Laser (L) | Press 0 until “L” shows | Boss fights only. High damage, penetrates enemies. But the beam is narrow — miss and you’re exposed. |
| Homing (H) | Press 0 until “H” shows | When overwhelmed by enemy count. Missiles track automatically. Lower damage but lets me focus purely on dodging. |
| Flame (F) | Press 0 until “F” shows | Rarely. Close-range only. I avoid it unless I’m desperate. |
| Machine Gun (M) | Press 0 until “M” shows | Early game or if I lose Spread. Faster fire rate than default rifle. Acceptable backup. |
Critical tip about weapon switching: When you press 0, the game cycles through your collected weapons instantly. But you can only carry one at a time. If you have Spread and you accidentally catch a Rapid power-up, you lose Spread. I jump over power-ups I don’t want. I’ve lost too many good runs to careless item collection.
Mission 2: Waterfall — Where I Learned to Look Up
The screen auto-scrolls upward. I cannot go back down. This changes my entire approach.
What I do: I stay near the left side of the screen. Enemies spawn from the right. I press 3 (up-right) to shoot ahead and above simultaneously with Spread Gun. This covers two threat vectors at once.
Platforming moment: Narrow ledges appear. I tap 6 in short bursts instead of holding it — this gives me precise control so I don’t run off the edge. Then I press * to jump to the next platform. If I overshoot, I fall into the waterfall below. Death.
Enemy snipers: They appear on ledges above me. I spot them early, press 2 + 5 to shoot straight up before they can fire. If I’m too slow, they shoot diagonally down at me. I dodge with 4 or 6, then return fire.
The falling rocks: About halfway up, rocks fall from above. I watch their shadows on the ground to predict where they’ll land. I position myself in the gaps. This took me maybe fifteen attempts to get consistent at.
Boss — The Giant Crab: It climbs the waterfall alongside me. Has two claws that swipe and a bubble attack. I stay on the leftmost platform possible. When a claw swipes from the right, I jump over it with *. When bubbles come, I shoot them with 5 — they can be destroyed. I use Laser (L) for this fight because the crab is a single large target. Narrow beam doesn’t matter when the target is huge.
Mission 3: Snowfield — Ice Physics and Patience
Ice changes everything. When I press 6 to move right, I keep sliding slightly after I release the key. Same for 4 leftward.
What happened to me: I slid off a cliff into a pit. I was holding 6 right up to the edge, released, and kept sliding. Death. Now I tap 6 in short bursts near edges. I release early and let momentum carry me the last few pixels.
Snow troopers: They throw grenades in an arc. I watch the grenade’s shadow. When it’s about to land, I press 4 or 6 to sidestep, then immediately 5 to shoot the trooper before he throws another.
The wind sections: Gusts blow left periodically. I press 6 harder (hold longer) to fight against it. If I stop pressing, the wind pushes me backward into enemies. I time my movements between gusts.
Boss — The Snow Tank: Bigger than Mission 1’s tank. Fires missiles that track slightly. I use Homing Missiles (H) here. While my missiles auto-track the tank, I focus entirely on dodging with 4, 6, and *. The missiles do less damage per hit, but I survive longer because I’m not trying to aim.
Mission 4: Energy Zone — Timing Is Everything
Laser barriers alternate on and off. Red means active, blue means safe.
How I navigate: I wait at the first barrier. It turns blue. I immediately press and hold 6 to dash through. If I’m too slow and it turns red while I’m inside, death. I don’t hesitate — hesitation kills more players than bad timing here.
Turret section: Multiple turrets on ceiling and floor. They fire in patterns. I use 3 and 1 to aim diagonally, hitting ceiling turrets without jumping into their line of fire. Floor turrets I hit with 7 and 9 (down-diagonal) while standing on a platform above them.
The conveyor belts: Some floors move left, some move right. I fight against the direction to stay in place, or move with them to speed through safe sections. I got crushed between a conveyor belt and a wall once because I wasn’t paying attention to the direction.
Boss — The Defense Core: A central machine with four orbiting shields. I cannot damage it while shields are up. I watch the shield pattern — they orbit clockwise with a gap. When the gap aligns with my position, I switch to Laser (L) and spam 5 for maximum damage during the brief window. This fight is pure pattern recognition. I died maybe twenty times before I got the rhythm.
Mission 5: Alien Lair — The Final Test
Enemy spawn rate doubles. Egg pods release aliens constantly.
My strategy: I destroy egg pods FIRST. They’re the source of infinite enemies. I use Homing Missiles (H) so I can focus on dodging while my missiles seek and destroy pods automatically.
The tight corridors: I inch forward with brief 6 taps to trigger enemy spawns one at a time. Rushing in gets me surrounded. Surrounded means dead.
Acid pools: Green liquid on the floor. Instant death. I jump over them with *. Some are too wide for a single jump — I look for platforms or time my jump from a higher ledge.
Final Boss — The Alien Heart: Three phases.
Phase 1: Fires straight projectile streams. Easy to dodge — I press 4 or 6 to sidestep between streams. I use Laser for maximum damage.
Phase 2: Spread shot pattern. Projectiles fan out in a wide arc. I find the gap in the pattern and stand still briefly. This is the only time in the entire game where standing still is correct. Moving into the pattern kills you. I hold my position, tap 5 with Laser.
Phase 3: Rapid fire plus ground minions. The heart fires constantly while small aliens run at me from both sides. I switch to Spread Gun (S) — the wide coverage hits minions while still damaging the heart. I jump over ground enemies with * and use 4/6 to dodge the heart’s fire. This phase is chaos. I focus on survival first, damage second.
When the heart explodes, the game shows my score and time. I cleared it on my thirty-seventh attempt. The satisfaction was incredible.
Advanced Techniques the Game Doesn’t Teach You
The Drop-Through Jump: Press 8 + * simultaneously on certain platforms in the Waterfall stage. Your character drops through instead of jumping. I use this for shortcuts to avoid enemy-heavy upper paths.
Rapid Fire Rhythm: My phone requires mashing 5 for rapid fire — holding doesn’t work. I developed a two-thumb rhythm: left thumb on 4/6 for movement, right thumb tapping 5 in a steady drumbeat. Practice this on Mission 1 soldiers until it’s automatic.
Weapon Preservation Discipline: When I have Spread Gun, I treat every power-up as a threat. I jump over falcons I don’t want. I once had a perfect run to Mission 5 with Spread, accidentally caught a Flame power-up near the final boss, and died because I couldn’t clear minions anymore. Now I avoid unknown power-ups like they’re enemies.
Screen-Edge Control: Enemies spawn based on screen scroll. I tap 6 in tiny bursts to inch forward, triggering one enemy at a time. This is slower but safer than holding 6 and running into a group of three soldiers and a turret.
The Pause Reset: If I panic and start mashing buttons, I press Left Soft Key to pause. I take a breath. I look at the screen, plan my next three seconds, then resume. The game doesn’t punish pausing. Better to pause than to die randomly.
Comparison: Contra 4 Java vs. Metal Slug Mobile
I’ve played both extensively. They’re both run-and-gun games on mobile, but they feel completely different.
Pacing: Contra 4 is relentless. Enemies never stop coming. Metal Slug is slower — you can stop, assess, plan your next move. I play Contra 4 when I want a ten-minute adrenaline rush. I play Metal Slug when I want a thirty-minute campaign with variety.
Controls: Both use similar keypad layouts, but Metal Slug adds vehicle entry (0 to enter tanks). Contra 4 is simpler — just you, your gun, and your reflexes. I find Contra’s simplicity more satisfying to master.
Health System: Contra 4 uses one-hit deaths. Metal Slug gives you a health bar and grenades. Metal Slug is more forgiving. But when I finally clear a Contra 4 mission, I know I earned it. There’s no health bar carrying me through.
Weapons: Contra’s cycling power-ups force snap decisions. Metal Slug lets you collect ammo for heavy weapons and keep your default pistol as backup. I prefer Contra’s system — higher stakes, more tension.
What Metal Slug does better: Vehicle sections, humor, and visual personality. Contra 4 Java has no vehicles, which is a shame. The aliens are cool but lack the charm of Metal Slug’s rebel army.
My recommendation: If you want pure, distilled challenge, Contra 4. If you want a more relaxed experience with mechanical variety, Metal Slug. I personally return to Contra 4 more often because its difficulty demands respect. Metal Slug I finish once and move on. Contra 4 I keep coming back to, trying to beat my time and score.
Troubleshooting Common Issues
Game runs too fast or too slow: This is a frame-rate issue common on modern phones running Java emulators. Look for emulator speed settings and adjust to 100%.
Buttons don’t respond: Clean your keypad. Check if your phone’s “Key Repeat” delay is set too high. Some phones need you to enable “Game Mode” for rapid key presses to register.
Game crashes at a boss: Common on low-memory phones. Close all other apps before playing. The Java version is small but boss explosions can spike memory usage.
Sound cuts out mid-game: Known bug in some ports. Restart the game — your progress usually saves at mission checkpoints.
Can’t tell if * or # is jump: Try both at the title screen. The one that makes the menu selection sound is your jump button. If neither works, check your emulator’s key mapping settings.
Conclusion
Contra 4 Java is a masterclass in distilled action. No health bars. No saves mid-mission. No hand-holding. Just you, a numeric keypad, and the relentless pressure of enemies that never stop coming.
I died hundreds of times learning these patterns. Every death taught me something — a spawn location, a boss timing, a weapon choice. When I finally cleared Mission 5, it wasn’t because I got lucky. It was because I understood the game.
Start on Normal. Prioritize Spread Gun. Never stop moving. Learn from every death. And when you finally see that Alien Heart explode, you’ll understand why this twenty-year-old mobile port still has players talking about it.
Now go run some guns.
